With it still being Winter in Texas, this is no time to be thinking about a Spring garden, right? Wrong…oh so wrong. If you already have a garden space, it is time to be planning what you will be planting this year, prepping your garden, and planting things like onions. If you don’t already HAVE a backyard garden, but are thinking of starting one this year, and I hope you are, it is time to start planning AND building. The success of your garden depends greatly on the quality of your soil and proper planning of what to plant where, so you don’t want to wait until it’s time to plant and rush though the prep process. So what kind of garden should you go with? When it comes to backyard gardens there are many directions you can go: container gardening, raised beds, in-ground, or a combination.
Containers are good for small spaces, but need a lot of water in the heat of the Summer. Raised beds are good if you have bad soil and don’t want to have to amend what you already have, but you will have to fill those beds with soil and compost, and the cost of that can add up. In-ground let you use a lot of what you already have and don’t require as much water as containers or raised beds, but do require a lot of labor to break up the existing soil and get it ready for planting. Each one has it’s benefits – it’s really up to you to decide which will work best for you based on space, money, and time.
When I was taking my first baby steps into gardening, I started with containers. Mostly standard pots at first, then I added a large tubs and a couple of sheep troughs.
I learned a lot from this small garden and got some tasty produce, but my ambition grew and soon that patio space was just not enough for all the things I dreamed of planting. No question about it, I needed to expand. The main problem I faced was that I have a tiny backyard, and most of it is graded for drainage…so not suitable for a garden. Hmmm….what to do? The only part of the yard that wasn’t part of the drainage slope was the 5 foot space directly around the patio. Perfect! Now what?
I decided I wanted an in-ground garden – building raised beds around the patio would have hemmed me in a little too much, and while raised beds allow for a longer growing season since they warm sooner than in-ground gardens, they also require more water during the hot months to keep them from drying out. Unfortunately, my yard soil was atrocious (almost entirely clay) and would need some serious amending to make it usable for the garden. Time for the fun, and the hard work to begin.
After a bunch of online research and talks with area nurseries, I decided I would amend my gross clay soil with compost (lots of compost), lava sand, Texas Greensand, and regular sand. A note about compost – I am not a fan of manure based compost. I know a lot of people swear by it, but since it is made from livestock animal manure, if it is not cured properly for any reason, it can carry things like E. coli. Most of it is probably completely safe, but since I want to eat the food from my garden, it is a risk I am unwilling to take. As for the other amendments; the lava and Texas Greensand add nutrients and minerals that my plants will love, and the regular sand helps to further break up the dense clay of my original soil. If your soil is not as clay based to begin with, the regular sand it probably not needed.
We needed to rent a small trailer to gather up the bags and bags and bags of amendments.
And then pile it all in the backyard.
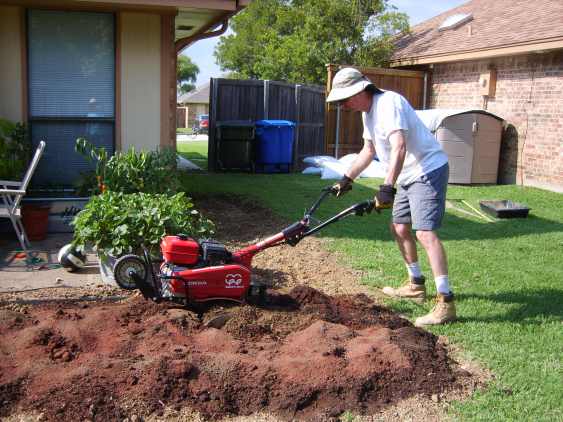
We marked off the perimeter of the garden, and Todd brought out the rented tiller.
It took a long time and a lot of blisters to till up the hard clay soil. Luckily, Todd is a determined man and doesn’t give up easily.
Once the clay had been thoroughly broken up, it was time to start mixing in the amendments. We decided to do it in stages to be sure the whole garden received enough of each amendment. First up was the compost…lots and lots of compost. We dumped the bags in the center, then I spread it over the surface with my hoe, then Todd came through with the tiller.
Next up: lava sand and Texas Greensand. I mixed them both together before tilling them in to the garden.
Last amendment: regular sand.
Finally, with all the amendments tilled in, my new garden soil is something my plants will find delicious.
But we weren’t done yet.
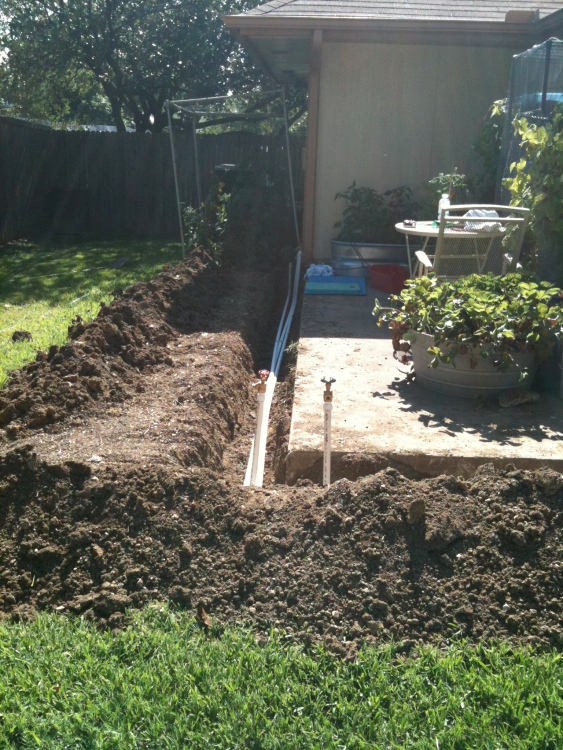
With my busy schedule, we knew that if we didn’t put in a good watering system, my poor garden would perish in the Texas heat when I became too busy to water it every day. Todd, the man who can do just about anything, came up with a plan to supply my garden with water. Unfortunately, I can’t go into detail about the particulars of this part of the garden because it was Todd’s brainchild and involves a lot of plumbing…I try to avoid all things plumbing. Basically, we put a sprinkler type system in the garden itself – the green valves run on a sprinkler timer and the red valves always have water available – there are three of each in the garden. From the green valves I run small hoses to each plant with small emitters – since they run on a timer, I can decide how much water the garden needs and what time of day is best and can easily change it as the weather heats up in the dead of Summer. As for the red valves, I can hook regular hoses to those for any other water needs I have in the yard.
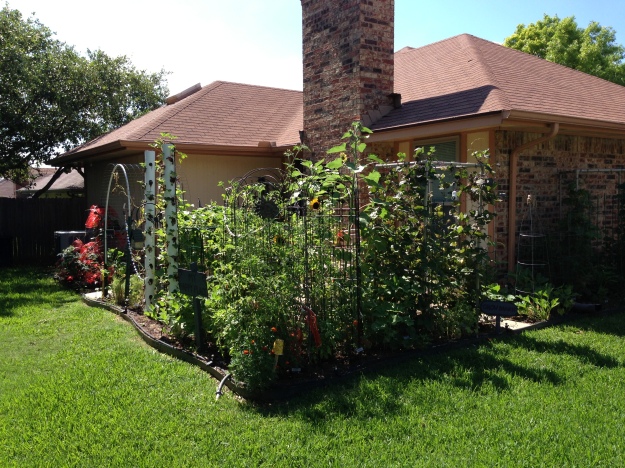
Once the watering system was in, the garden was ready for some edging…and PLANTS!! In this picture you can see the little black hoses that run from the green valves to the individual plants. (I will have more on this in a future post.)
With good dirt and plenty of water, my garden quickly thrived.
I know it seems like a lot of work – and, boy howdy, it was – but if you are interested in having a garden, all that labor is totally worth it. Eating your own strawberries, lettuce, peppers, tomatoes, etc…there is nothing like it. So even though it is still chilly outside, start making your plan and gathering your supplies. Before you know it, the weather will warm it will be time to get some tasty things growing!


Bravo! Well done post. Happy Gardening from your Texas neighbor. ~ Shannon @ DirtNKids
Thank you, Shannon!
Pingback: The Strawberry Tower – a lot of berries in a small footprint | The Fervent Gardener